DIY Console Table
This might be my favorite DIY furniture piece yet! We knew we needed something bold and original for this DIY console table and we quickly found our inspiration at Lula and Georgia. Lets just say it was a bit out of our budget and not the right size! We decided to make this high-end table on our own. It is the perfect modern console table for our space. We were able to make this table for $160.
We have this console table in our entryway but this design could easily find a location anywhere in your home. It has such an organic feel that is sure to impress.

This DIY is a fun easy project using some basic wood working skills! We decided to use white oak but this console table can be made using any 3/4″ thick hardwood! The best part of all is you can change the dimensions to make this fit perfectly in your home. Check out our plans below.


Tools and Material needed:
- 3/4″ hardwood boards
- Brass furniture tacks
- Kreg jig or dowel jig (for legs)
- Dowels
- Tables saw
- Miter saw
- Jigsaw for cutting radius ends
- General Finishes Satin Clear Topcoat (Our favorite top coat for white oak)
- large clamps
- Nail gun
Modern Console Table Steps
- Start off by using clamps to glue together boards for the 3 shelf parts
- Cut them to size with table saw and use a Jigsaw to cut the radius ends on all 3 parts
- Cut all the slat parts to size with a table saw and miter saw
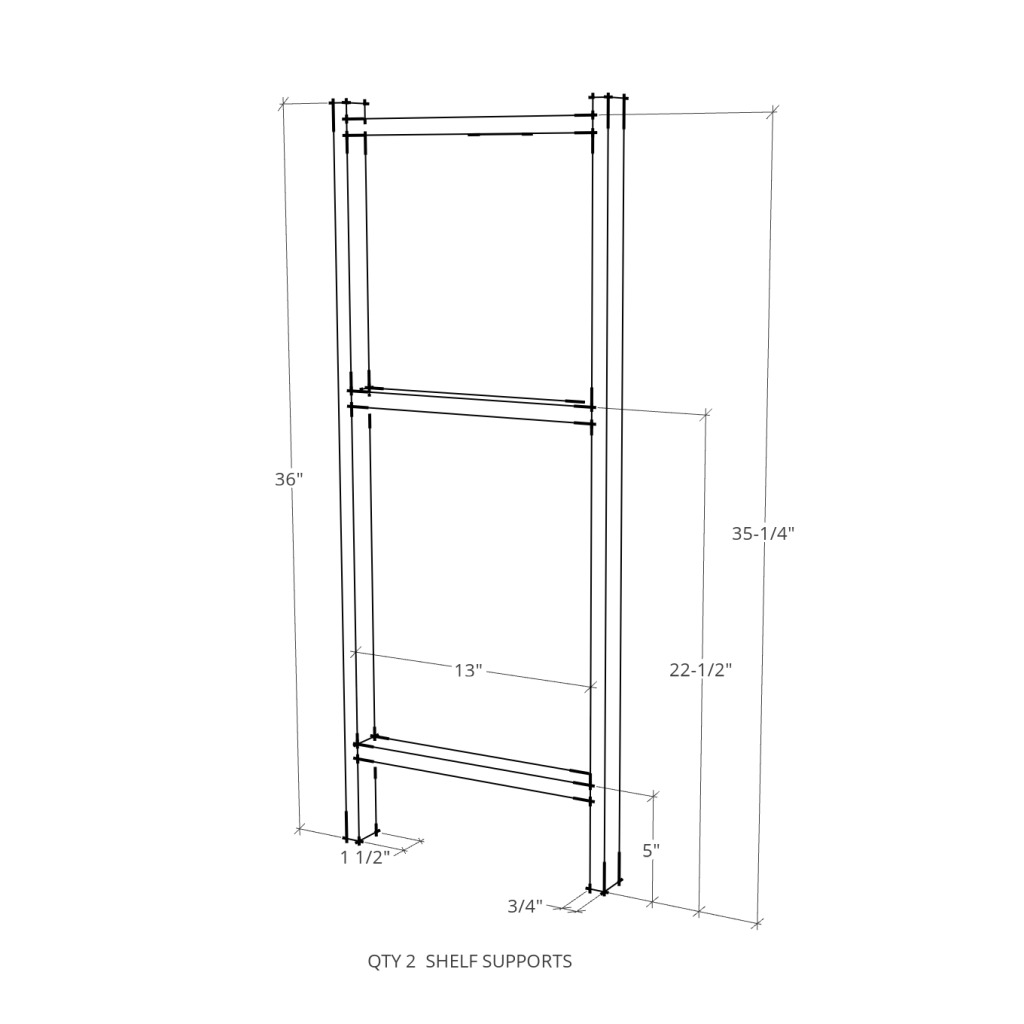
- Cut and assemble the “Ladder frames”
- Place shelves on the “Ladder” frame. Predrill and screw from the bottom
- Fasten the slats with brad nails using a spacer block
- Attach brass furniture tacks with a small hammer
For some more great tool recommendations for this project check out my post on starting your DIY tool kit.
Check out our highlight and tips for this Console table DIY here and our DIY Wood Console Table Web Stories
Plans


4 Comments
Comments are closed.